Fixing “Dead” Sordins
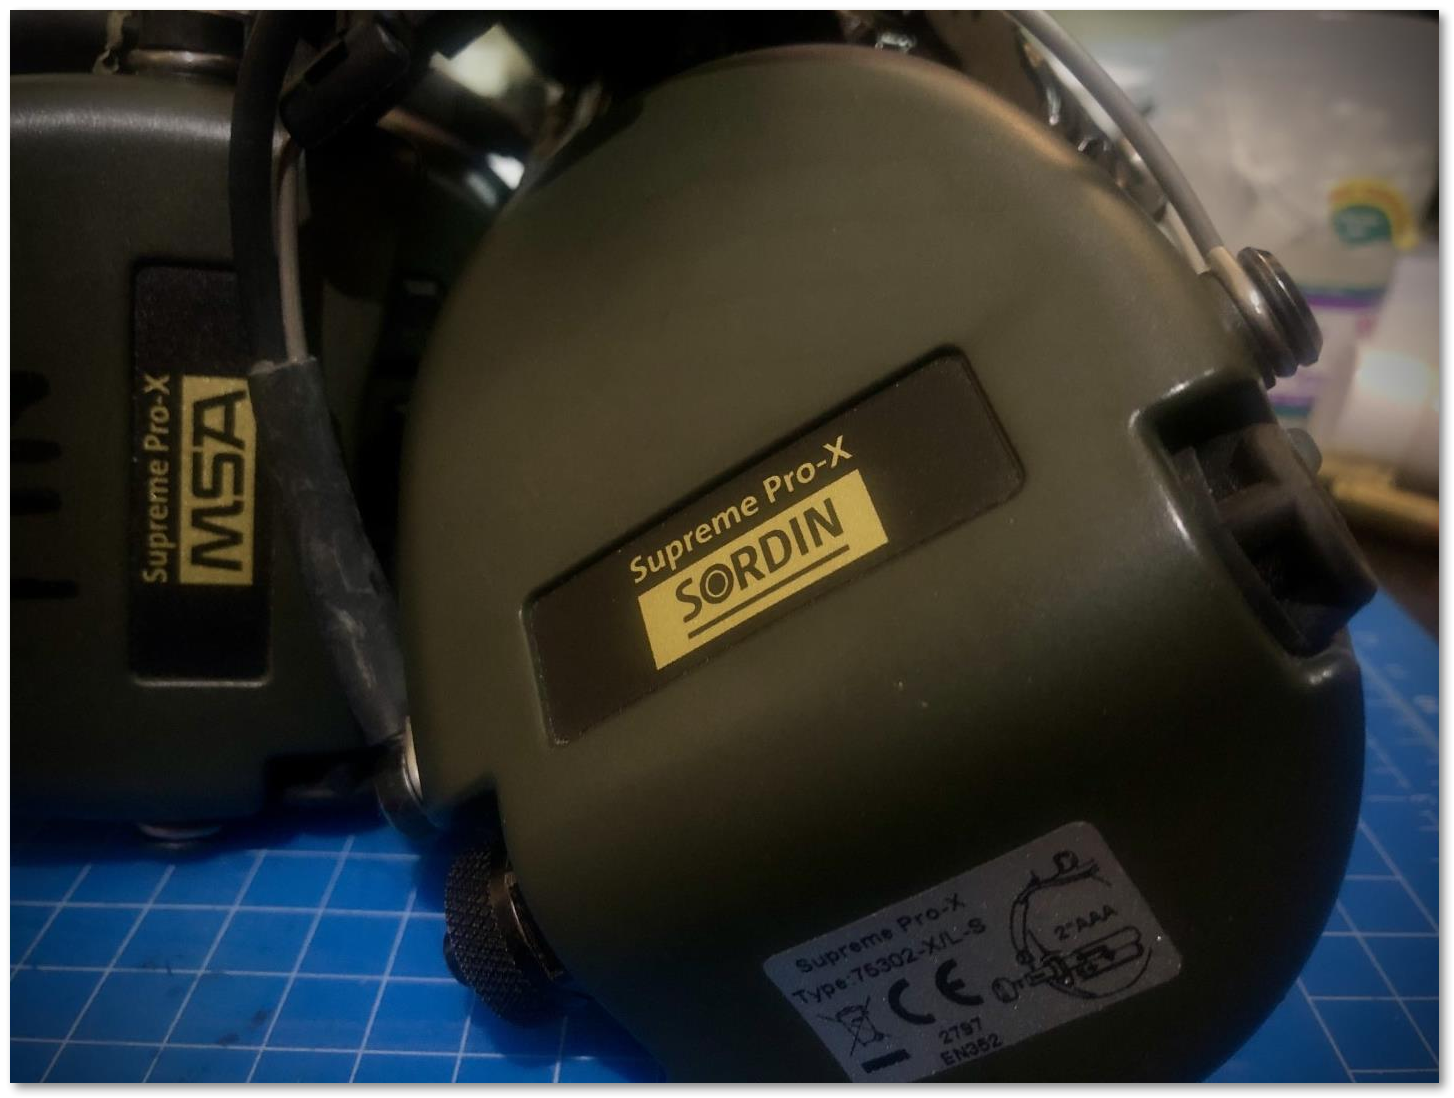
Sordin Supreme Pro-Xs
The Problem
Sordin Supreme series electronic hearing protectors / “earpro’s” can have an issue with their battery compartment leading to the user thinking the device has failed.
Common symptoms include:
- Intermittent power before total lost of power/function during vibration or a lot of head movements.
- No power when batteries installed/fresh batteries are installed.
- Signs of corrosion with old batteries.
- Broken battery tab on the removal of old batteries.
- Batteries are easy to remove - a sign of weak battery contacts/clips/springs/tabs etc.
As mentioned previously, the most common culprit to thinking the Sordins have died is the battery compartment, specifically the spring steel contact tab for the negative battery terminal. This is easily noticeable if the second battery you would remove (the first one you install) falls out easily as the original tabs should provide some retention.
This is a manageable fix with basic tools if the Sordin’s are out of warranty.
Tools Required
- Torx T8 screwdriver
- A hobby/precision/utility knife
- Needle nose pliers
- Soldering iron (optional)
- Hot glue gun/electronics safe RTV/silicone (optional)
- Thread-locker (optional)
Video
There’s an existing video on YouTube that covers a bulk of the repair, but hopefully I can provide some more clarification/details to support the video as I ran into this video after I fixed my first pair.
Instructions
- Remove AAA batteries in the hearing protectors and put the battery cap aside.
- Remove the locking nut and male thread adapter for the battery cap with needle nose pliers.
- This is the part that keeps the battery compartment (the light grey coloured polymer part - there might be some variations in colour as I’ve seen them in black as well) affixed to the hearing protector and what the battery cap screws into.
- There is likely some sealant/thread-locker you need to breakthrough as the locking nut/male thread.
- Needle nose pliers are recommended as there’s barely enough clearance for anything else.
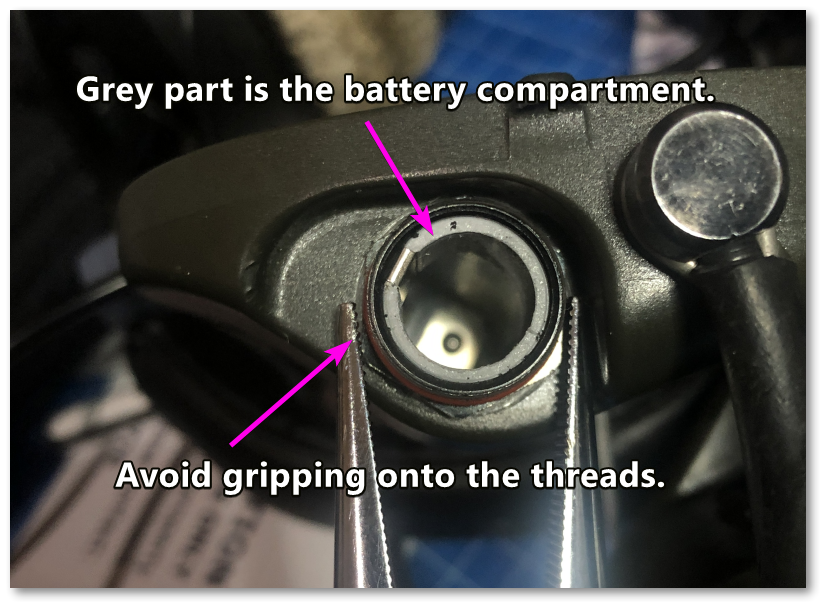
Removing the threaded lock nut on the battery compartment.
- Remove the foam or gel ear cups and the foam inside from the side that has the battery housing.
- Simply pull straight out and away on the plastic rim of the foam/gel ear cups.
- Use a Torx T8 driver to remove the 4 screws that hold down the PCB
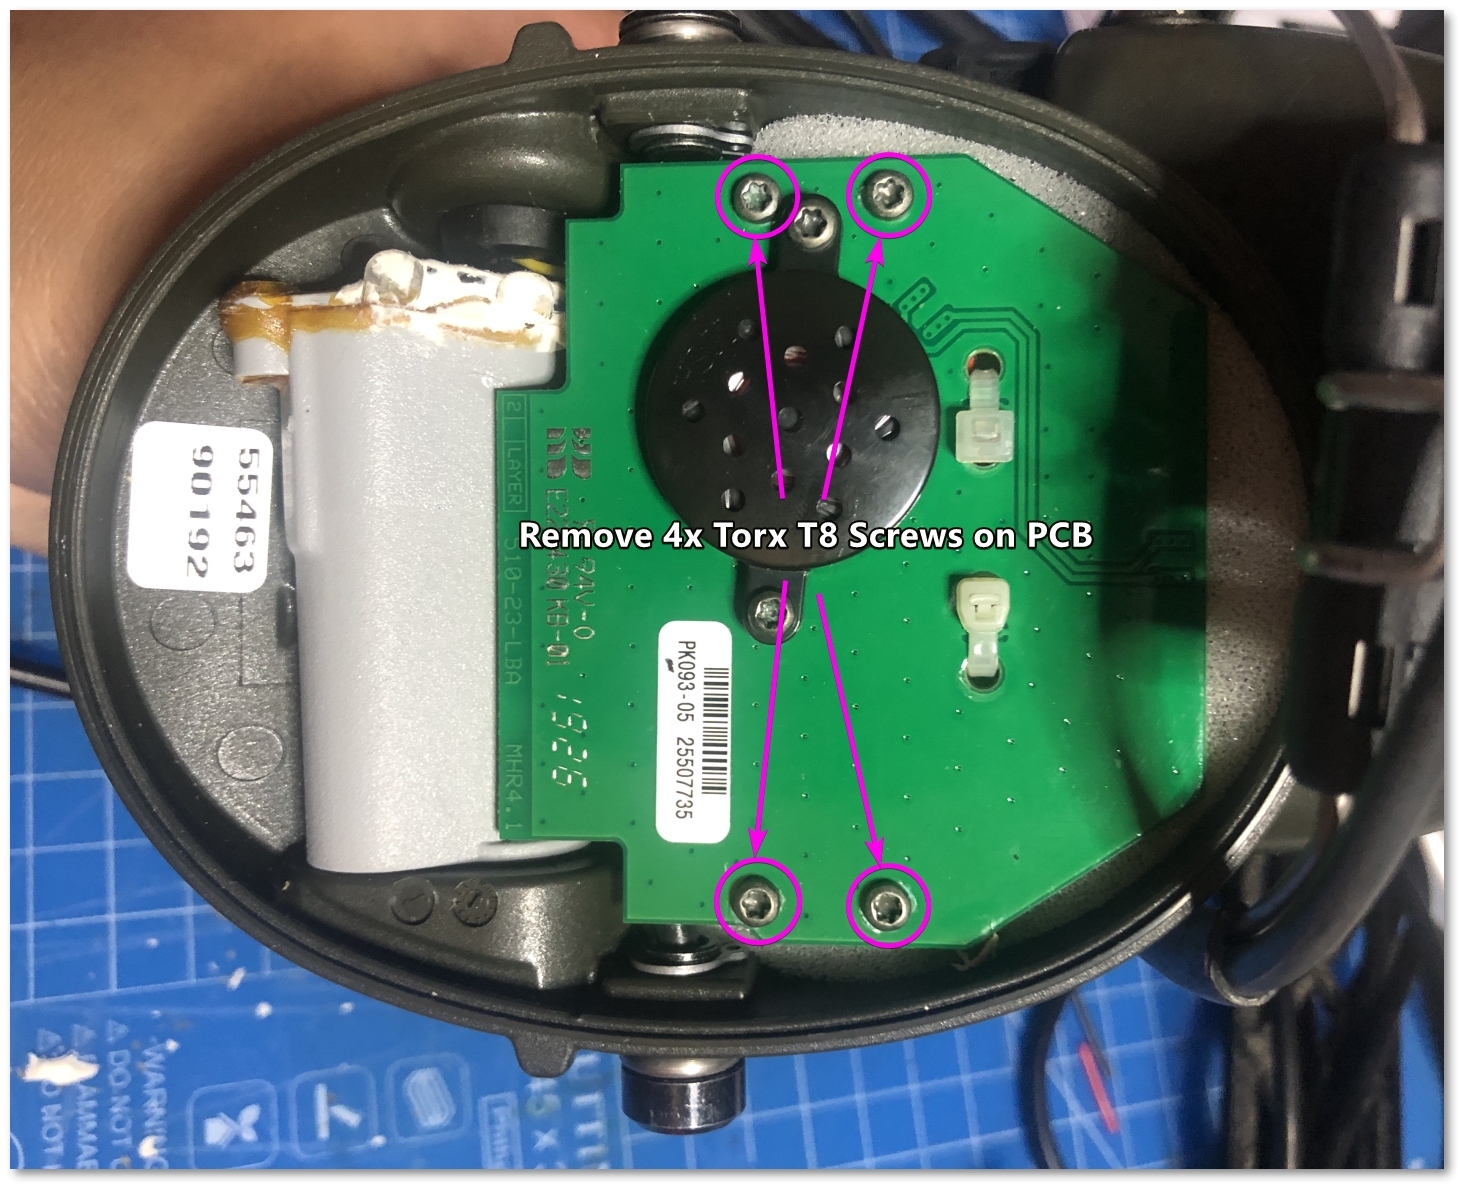
Remove the 4x Torx T8 self-tapping screws.
- Move the PCB slightly out of the way (it can’t separate unless you desolder some leads) so you can work on the battery compartment.
- The battery compartment should just slide out underneath from the PCB once it is out of the way.
- Remove the sealant around the battery compartment to aid in removal of the battery compartment cap.
- I recommend scoring at the seam between the body and cap of the battery compartment.
- I recommend using a soldering iron to melt and clear what you can of the sealant that is covering the T8 screw heads so you can use the driver properly - if you don’t have one you can work at it with the sharp point of your knife.
- I don’t recommend scoring/scraping at the white RTV/electronics silicone to prevent damage to the battery cables that are underneath - it should bend/fold (or cleanly break away) away once you begin to break apart the battery compartment.
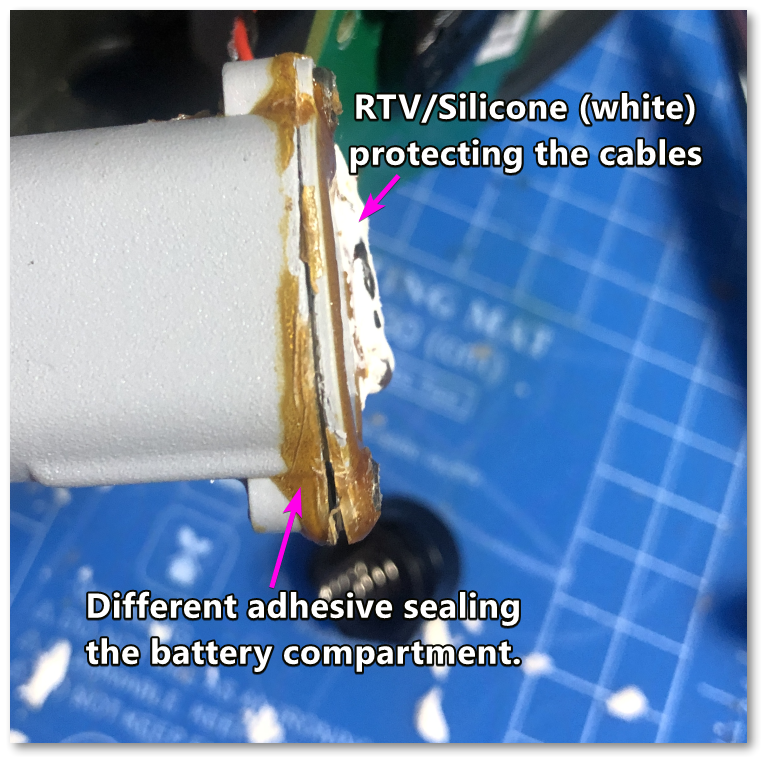
Sealants around the battery compartment - after cutting open with a knife.
- Use the Torx T8 driver again to remove the two self-tapping screws that hold the battery cap/terminals to the battery compartment.
- Using a thin sharp knife like a hobby/exacto/utility blade, pry apart the battery compartment and battery compartment cap.
- Start at the end opposite of the battery cables and work your way around.
- Carefully separate the battery compartment body and cap - taking note of the battery terminals inside.
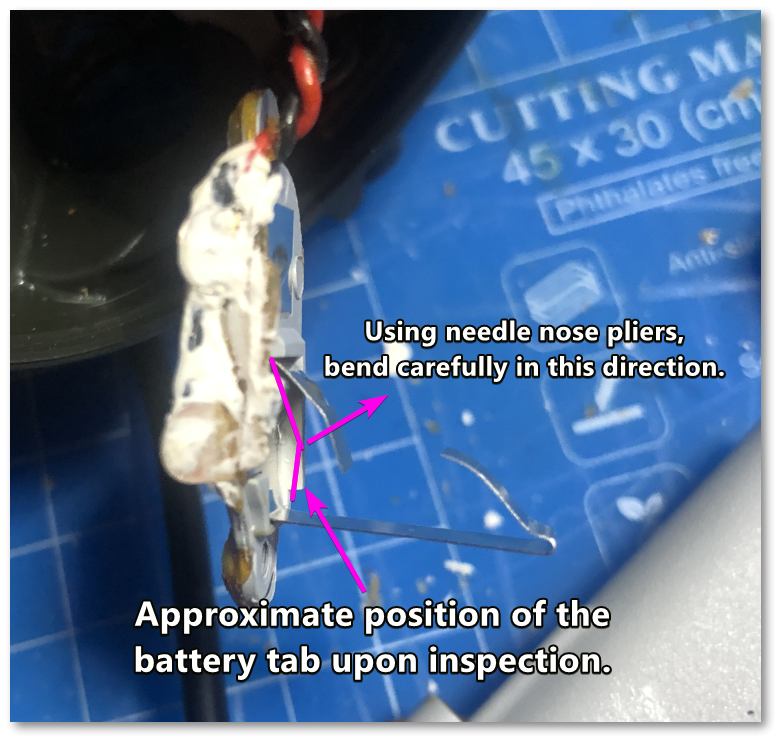
- Carefully bend the negative battery spring contact (highlighted below) outwards so it provides better contact with the battery.
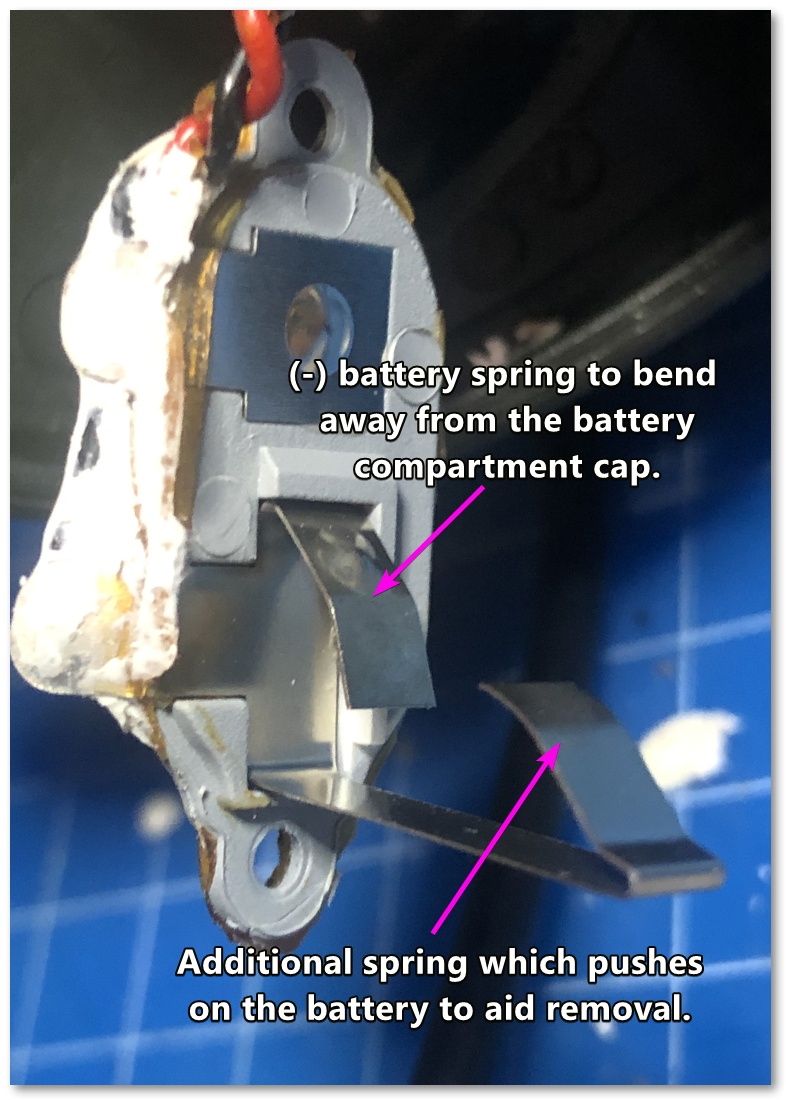
Battery compartment battery cap and battery spring contact.
Battery spring contact positioning.
- Test the fix by inserting batteries in the battery compartment and powering on the Sordin’s. You will need to screw the locknut/battery cap onto battery compartment to complete the circuit.
- Once tested that the fix works - you can reverse the steps to reassemble the Sordin’s and optionally apply hot glue/electronics safe silicone where you removed adhesives and plastic safe thread- locker for the locknut.
Additional Thoughts and Notes
Another remedy for this that has been talked about is packing the battery compartment with a small bit of compressed aluminium foil to help the battery achieve a good connection on the battery spring contact. This more involved method provides a more permament solution and you don’t have to fiddle with the aluminium foil each time you have to replace the batteries. It could also get extra messy if your battery decides to leak.
In the case that the battery contact tab snaps, you can solder the broken tab back on. Or alternatively solder on a more traditional spring coil battery contact.